This documentation describes a release under development. Documentation for the latest release, 3.6.2, can be found here.
NetSuite
Overview
The NetSuite plugin enables Mitto to pipe data from NetSuite and store the data in a database.
NetSuite Initial Setup
In order for Mitto to connect and access data via the NetSuite API, follow the instructions in this section. This only needs to be done one time.
Note
This setup requires a NetSuite administrator account!
During the NetSuite setup, you’ll obtain the following information which Mitto needs in order to access your data:
Account ID
Consumer Key
Consumer Secret
Token ID
Token Secret
Enable features
Note
If these features are not enabled, you will not see the permissions required in later steps.
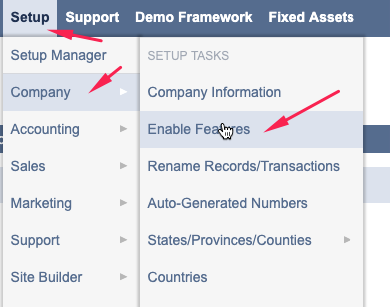
From NetSuite’s top menu, click Setup > Company > Enable Features.
Click the **SuiteCloud ** tab.

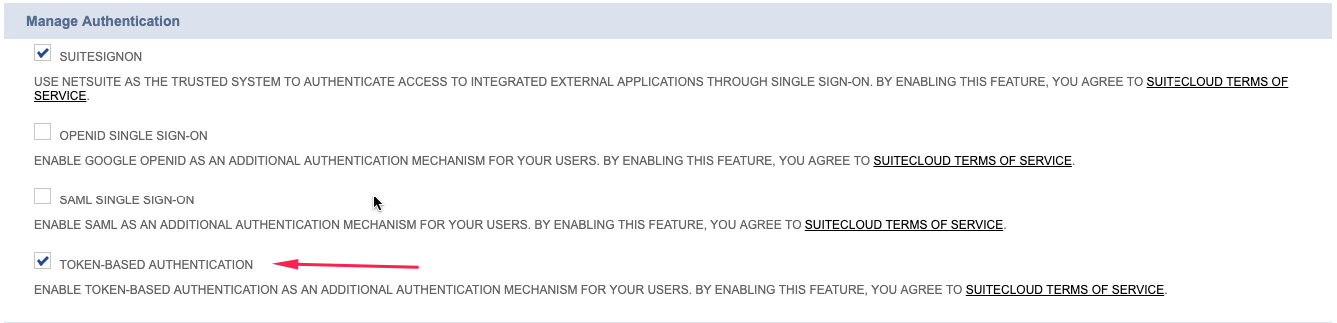
Under SuiteTalk (Web Services) make sure SOAP WEB SERVICES is checked. Accept “Terms of Service” if checking for the first time.

Under Manage Authentication make sure TOKEN-BASED AUTHENTICATION is checked. Accept “Terms of Service” if checking for the first time.
Click Save at the bottom of the page.
Install bundle with Mitto role
Note
This bundle adds a new role to your NetSuite instance that will be used in later steps.
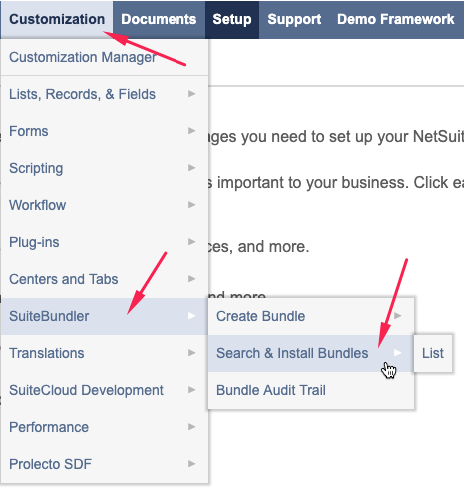
From NetSuite’s top menu, click Customization > SuiteBuilder > Search & Install Bundles.
Type
Zuarin the KEYWORDS search field and click Search.
Click on the
Zuar, Inc. - Mitto Bundle. The BUNDLE ID is387543.Click Install and then Install Bundle.
Account ID
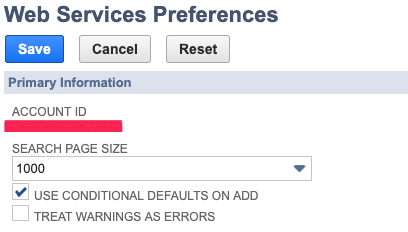
From NetSuite’s top menu, click Setup > Integration > Web Services Preferences.
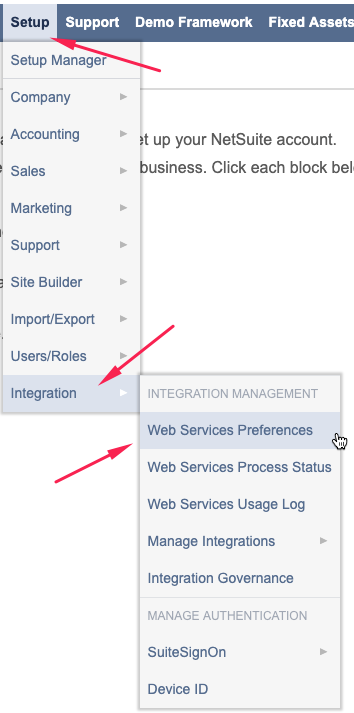
Copy the ACCOUNT ID and save for later. (Obscured by a red box in the screenshot below.)
Create an Integration Record
Note
The integration record identifies the application (Mitto) in NetSuite’s system.
From NetSuite’s top menu, click Setup > Integration > Manage Integrations > New.

Create a new Integration Record by completing the form with the following information:
DBMS |
Parameter |
|---|---|
SQL Server |
?driver=ODBC+Driver+17+for+SQL+Server |
Snowflake |
?warehouse={warehouse} |
Click Save.
Copy the the CONSUMER KEY and CONSUMER SECRET and store them in a safe place (e.g. password vault) for later.
Create a New NetSuite Employee
Note
The instructions in this section create a new user in NetSuite for use by the Mitto integration. If preferred, you can use an existing NetSuite user (employee) and assign the Mitto role to that employee. Whichever employee you use will be tied to the Mitto Integration record via an Access Token.
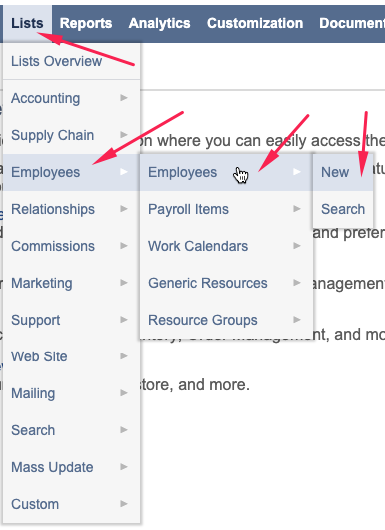
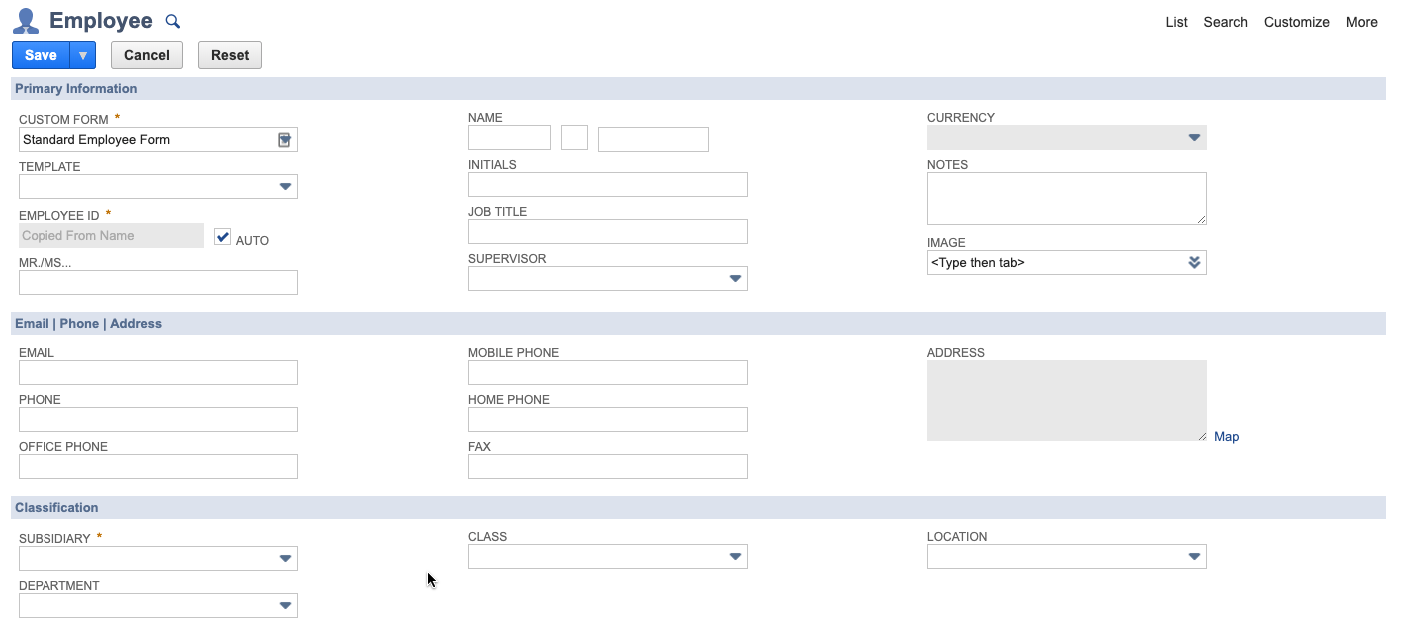
From NetSuite’s top menu, click Lists > Employees > New.
Complete the form with the information required by your organization (Name, Email, Subsidiary, etc).
On the Access tab, set up a password based on your organization’s policies. Store this password securely for use with Mitto.
Under Roles, assign the
Mitto User Role(this role is from the bundle you installed earlier).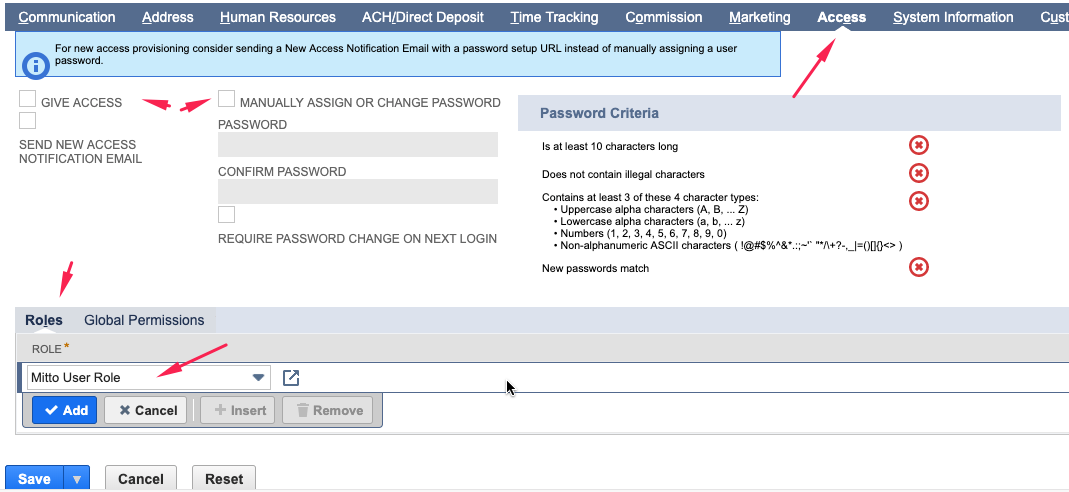
Click Save.
Create an Access Token
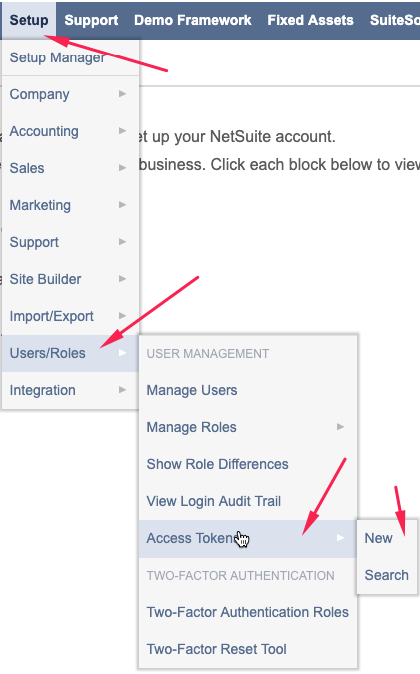
From NetSuite’s top menu, click Setup > Users/Roles > Access Tokens > New.
Complete the form with the following information:
APPLICATION NAME: Mitto
USER: (the Mitto employee/user you created previously)
ROLE: Mitto User Role
TOKEN NAME: (leave unchanged)
Click Save.
Copy the TOKEN ID and TOKEN SECRET and store securely for use in Mitto.
Create NetSuite jobs in Mitto
Using the values retrieved during the one-time NetSuite setup above, we next configure Mitto jobs to download your NetSuite data.
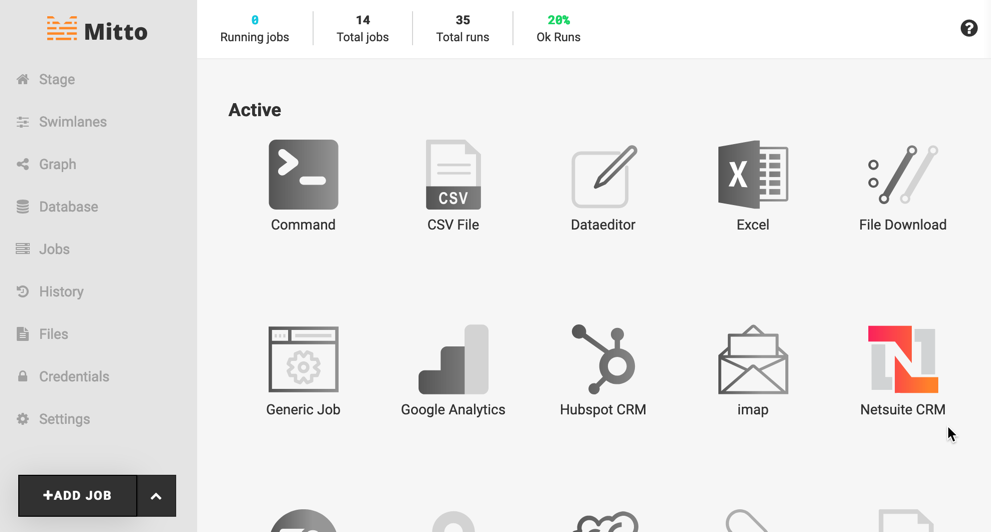
In Mitto, select Add Job on the left sidebar. Select NetSuite CRM from the list of plugins.
Enter the information you gathered from the one-time NetSuite setup above into the Mitto NetSuite wizard. Your NetSuite
ACCOUNT IDshould be entered into the Account field.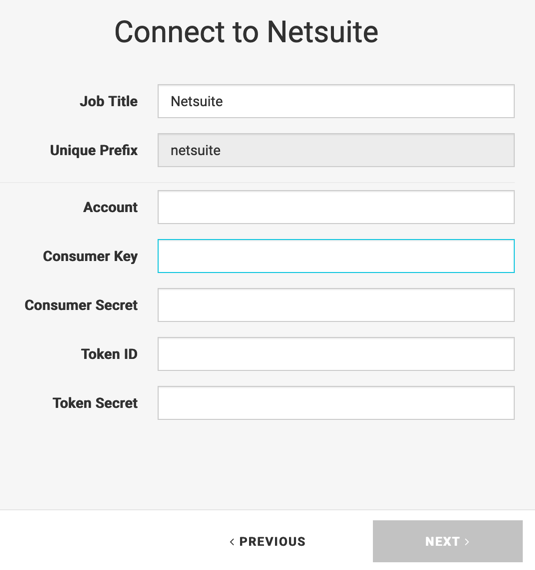
Click Next.
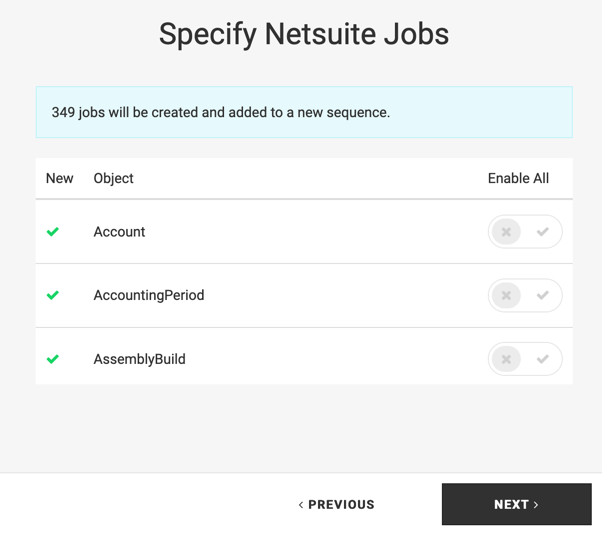
The next step asks you to select which NetSuite jobs to add to a sequence. You can choose to Enable All the jobs or you can Disable All to select individual jobs you want to create. Select Next after you have chosen which jobs you want to add.
On the next screen, specify the where NetSuite data should be stored.
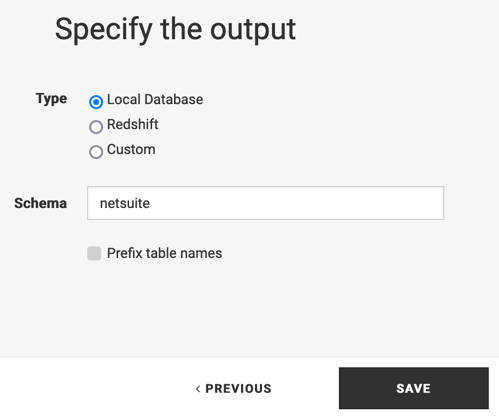
Type
Local Database (recommended): Mitto’s internal PostgreSQL database
Redshift: AWS-hosted database
Custom: Specify the connection string of the destination database
Schema
The schema is a database organization mechanism which groups database objects (tables, views, etc.) and can be used for security purposes.
The default schema is:
netsuite
Prefix table names
Checking option box will prefix each table created by the Mitto NetSuite jobs with
netsuite. This is convenient when tables are not being created in a NetSuite-specific schema.
Click Save.
Congratulations! You have just connected NetSuite to Mitto.
Note
A sequence with one or more jobs will be created by Mitto’s NetSuite wizard. If you run the sequence, all jobs (potentially several hundred) will be executed and may take a long time. You can run individual jobs if you don’t want Mitto to download all NetSuite data at once.
Next, schedule your NetSuite jobs so the data stays updated.
NetSuite Saved Searches
You will often want to get data from a NetSuite Saved Search. Refer to the Saved Search documentation for more details.